Blog
Archive for the ‘Z axis’ Category
Add Bearings to Z Cart Rail Runners
Monday, June 30th, 2014Z Axis Parts
Friday, July 27th, 2012For this section you’ll need:
- Z Cart Panels
- (1) Z Cart Back
- (1) Z Cart Front
- (1) Z Cart Bottom
- (1) Z Cart Top
- (2) Interior Z Cart Rail Runner
- (2) Exterior Z Cart Rail Runner
- (2) Z Cart Spacer
- Z Sled Panels
- (1) Z Nut Trap
- (2) Z Rail Runner
- (1) Z Sled Spacer
- (1) Z Sled Face
- (2) Tool Holder
- (~50) 8mm bolts, washers and nuts
- (16) Skate bearings
- (2) Stepper motors
- (1) ~8.5″/215mm length of ACME rod
- (1) ACME nut
- (2) Bushings
- (2) ~9″/230mm length of 1/4″/6mm diameter steel rod
- (2) ~28 3/4″/730mm-long sections of aluminum angle (3/4″ or 19mm leg length)
ACME Screw
Thursday, May 31st, 2012Thread the ACME screw into the ACME nut in the Z Sled. Twist the screw until the nut is about halfway down the length of the screw.
Use a shaft coupler to connect the shaft of the Z Axis Motor to the top end of the ACME screw. You may have to loosen the bolts on the Z Sled to get it to snap onto the Z Rails.
Z Sled Rails
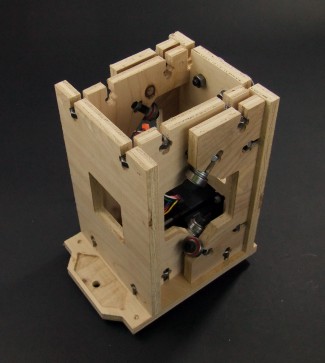
Thursday, May 31st, 2012Slide the Z Sled Rails through the arrow-shaped slots in the Z Cart Top. Push them until they are securely seated in the diamond-shaped indentation in the Z Cart Bottom. Add two Z Rail Spaces to the top and the bottom of the rail pair to fix in place.
Z Cart Front
Thursday, May 31st, 2012Exterior Z Cart Rail Runners
Thursday, May 31st, 2012Interior Z Cart Rail Runners
Thursday, May 31st, 2012Z Cart Bottom
Thursday, May 31st, 2012Z Cart Back
Thursday, May 31st, 2012Attach Z Sled Face Panel
Thursday, May 31st, 2012Bolt the Z Sled Face panel to the Z Sled Rail Runner assembly. Don’t forget to apply ironic sticker.


